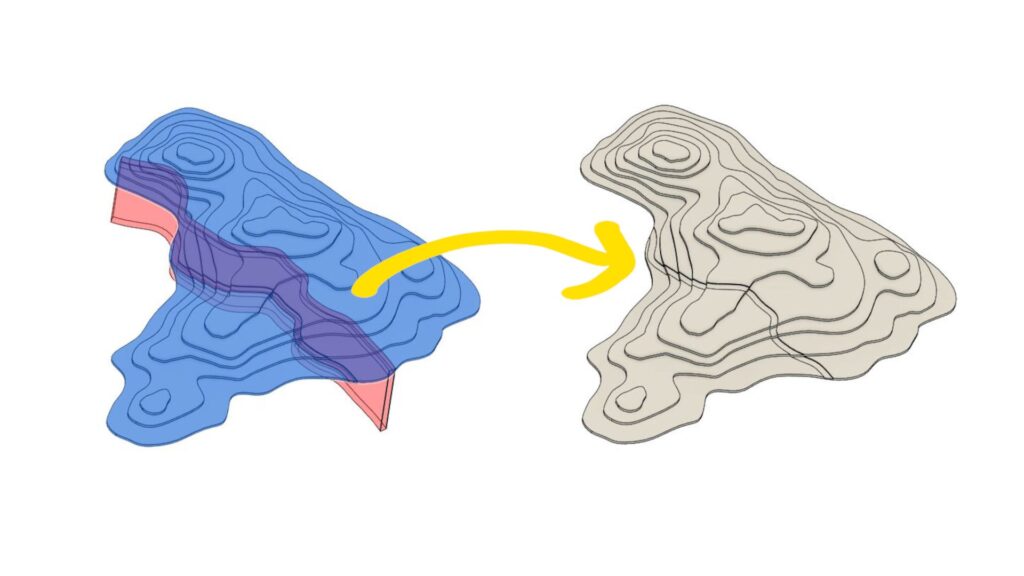
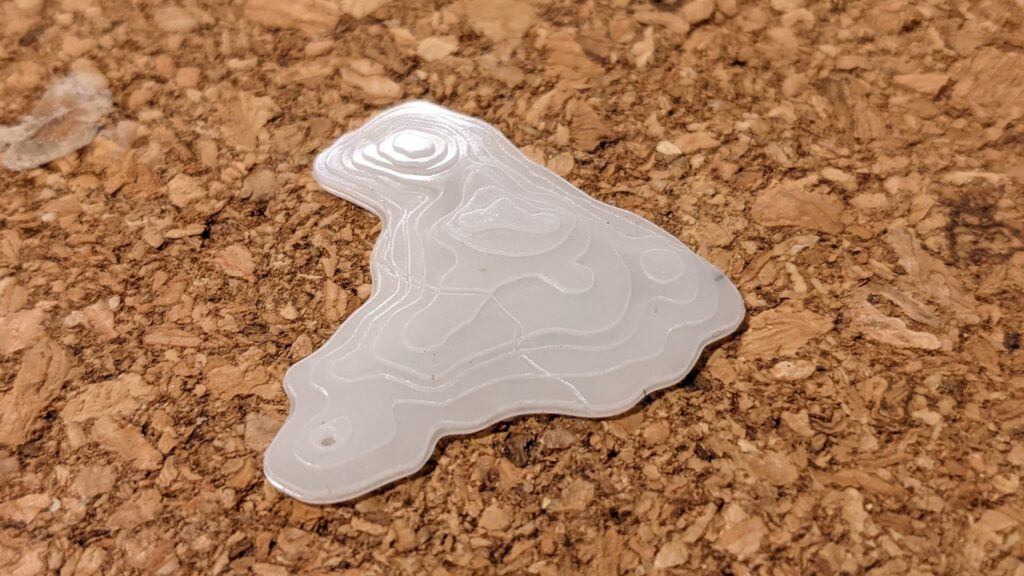
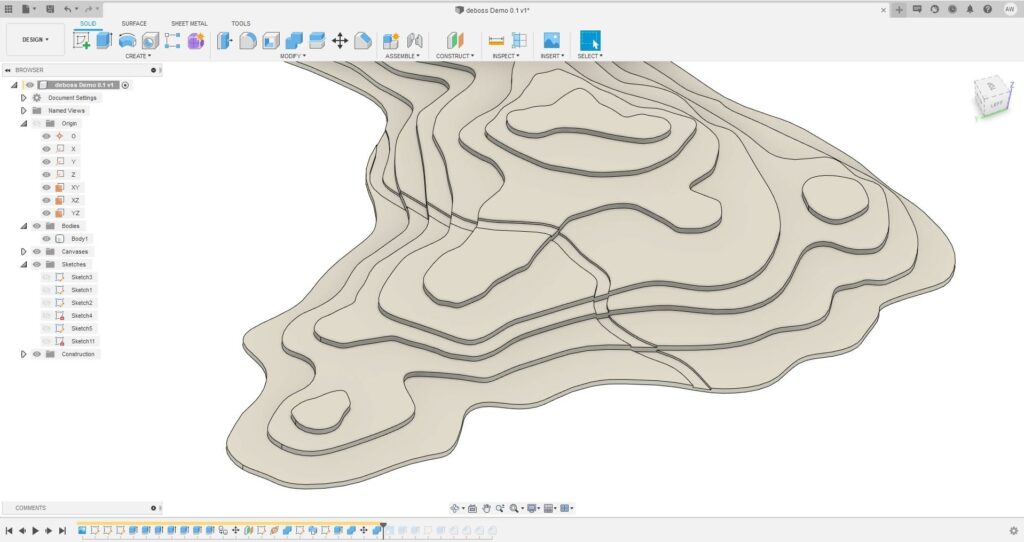
In this post I wanted to share the the workflow I used to deboss the hiking trail feature on my Topography Earrings project.

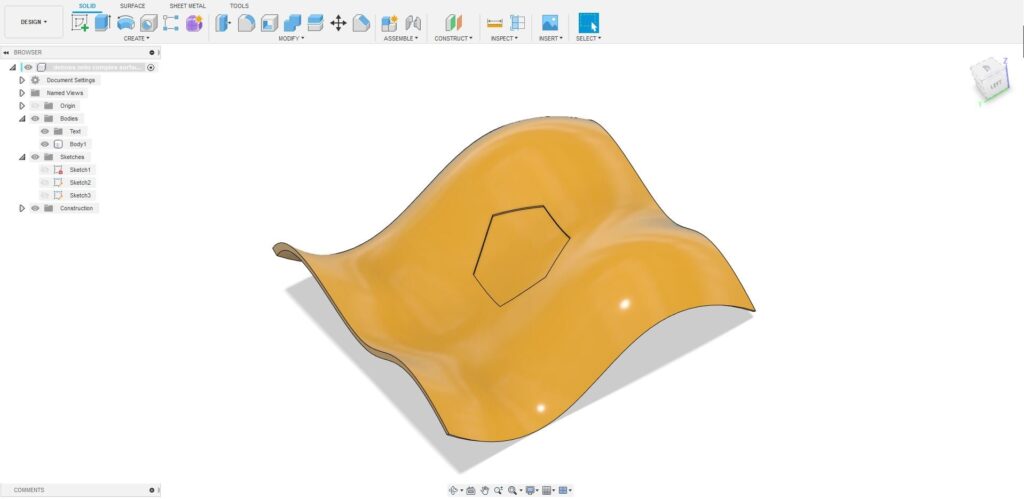
This method is a good complement to the inbuilt ‘Emboss’ tool in Fusion 360. As opposed the Emboss Tool, with this workflow you can deboss across multiple surfaces and on complex compound curved surfaces.
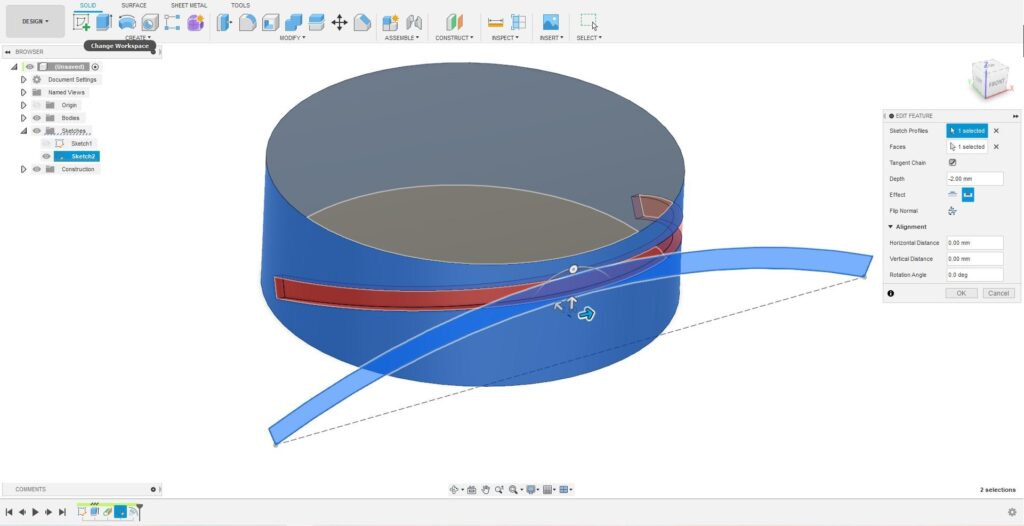
Unlike the Emboss Tool, this workflow won’t wrap the deboss shape around a surface. It also takes longer to set up, so I’d only use it in situations the inbuilt tool doesn’t suit. Angus from the fantastic Makers Muse Youtube Channel has a great video on using the Emboss Tool in Fusion 360.
With a couple more steps this workflow can be adapted to emboss rather then deboss. I’ll focus on the deboss use because it’s a bit easier, and it’s the workflow I used on my earring project.
It’s also takes a slightly different workflow to deboss several sketches, such as text, onto a single complex face. I won’t cover how to do this here for brevity, but may write up a separate tutorial on it in the future.
Advanced Debossing Workflow (Fusion 360)
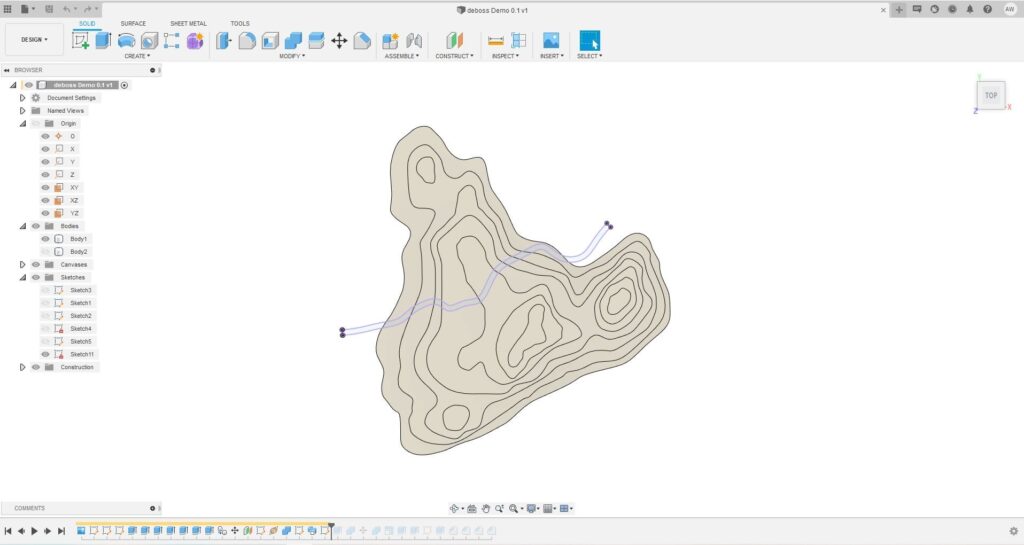
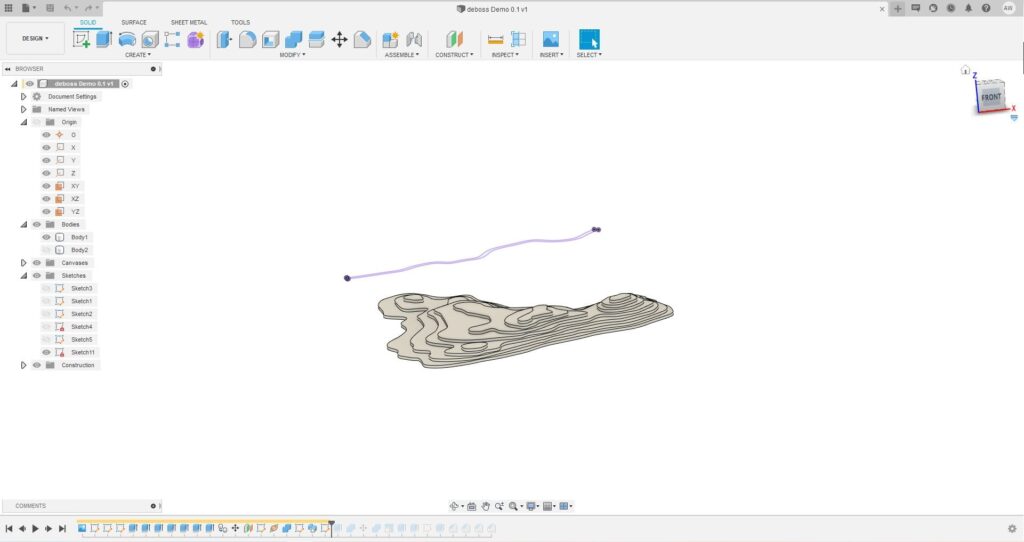
Step 1: Create the Deboss Sketch
For the first step we’ll create the deboss sketch some distance from the part body. Any closed shape should work as a deboss sketch.
Step 2: Extrude the Deboss Sketch Through the Body
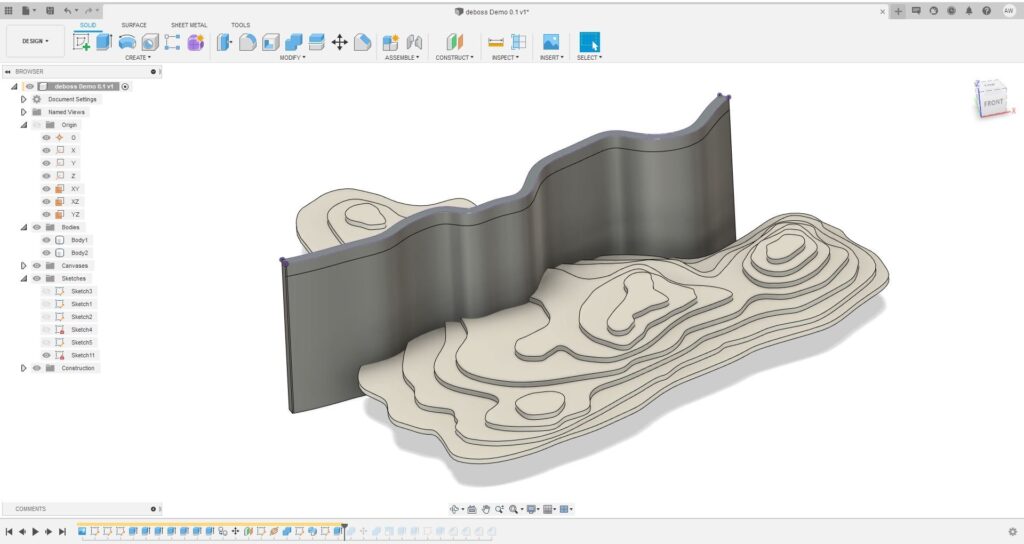
Next we extrude the deboss sketch through the part body. It’s not important how long the extrude is, just that it passes through the entire body.
Be careful that you don’t join the new extrusion to the existing body, they will need to be separate bodies for this to work.
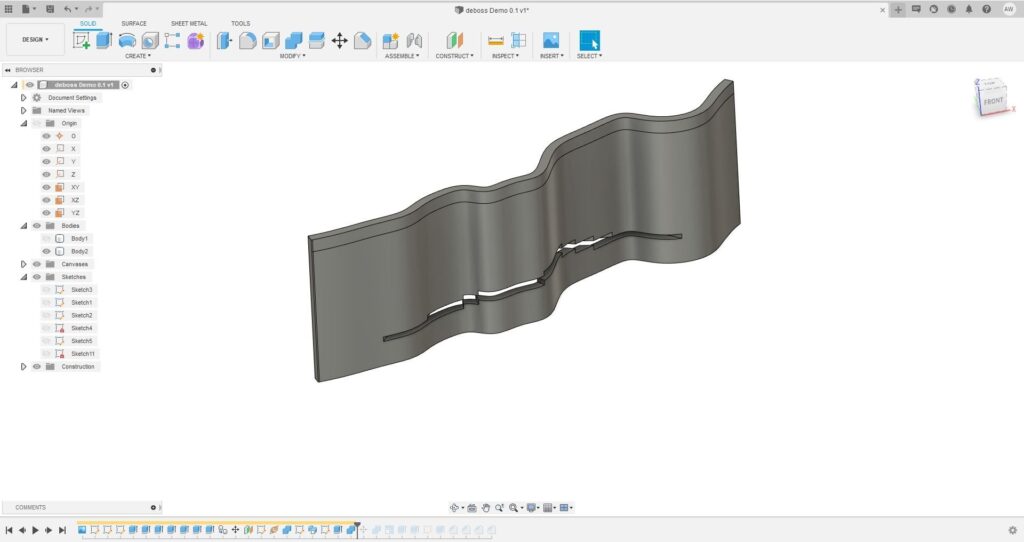
Step 3: Cut the Deboss Body with the Part Body
This step is a bit unintuitive, what we do is use the ‘Combine’ tool to cut the deboss body with the part body. Make sure to have ‘Keep Tools’ selected so the part body isn’t deleted.
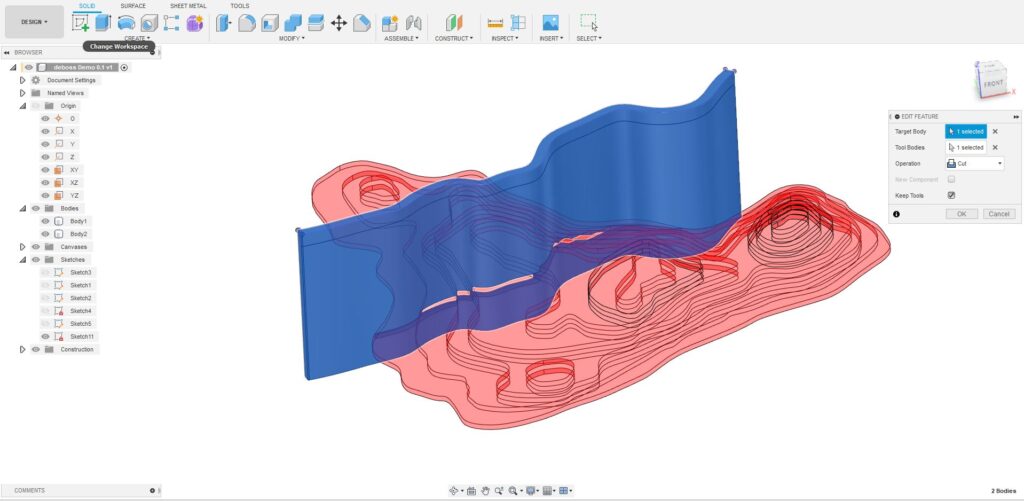
If done right, the deboss body should have a neat cut out of the main body in it.
Step 4: Translate the Deboss Body
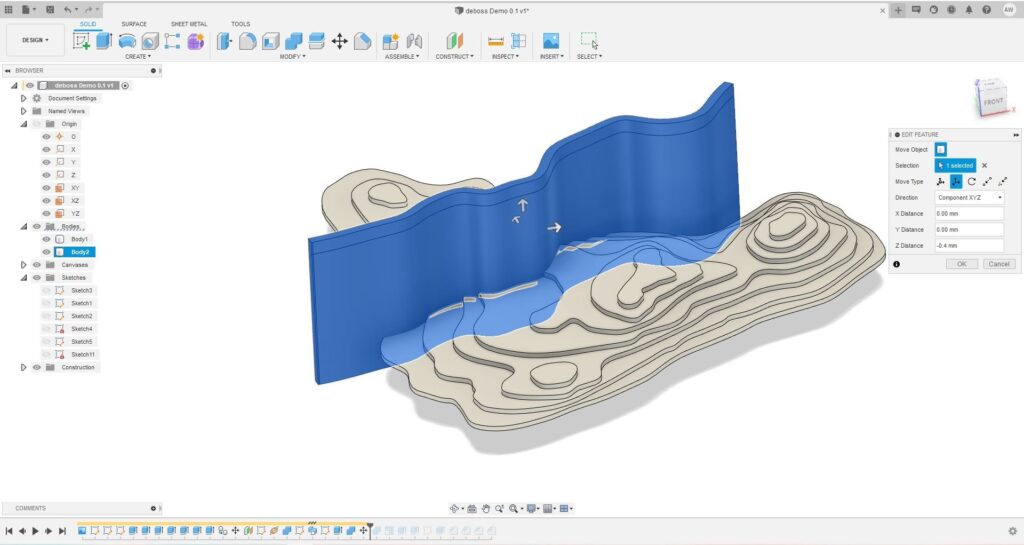
We now use the ‘Move/Copy’ tool to translate the Deboss body the depth we want the Deboss to be. In the case of the Topography Earring we want the Deboss to be 0.4mm deep.
Step 5: Complete the Deboss
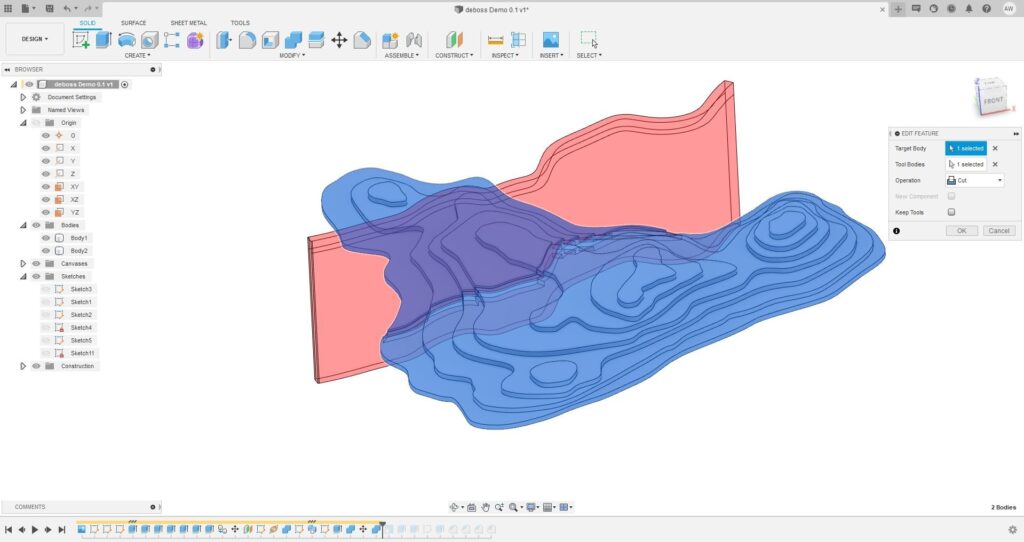
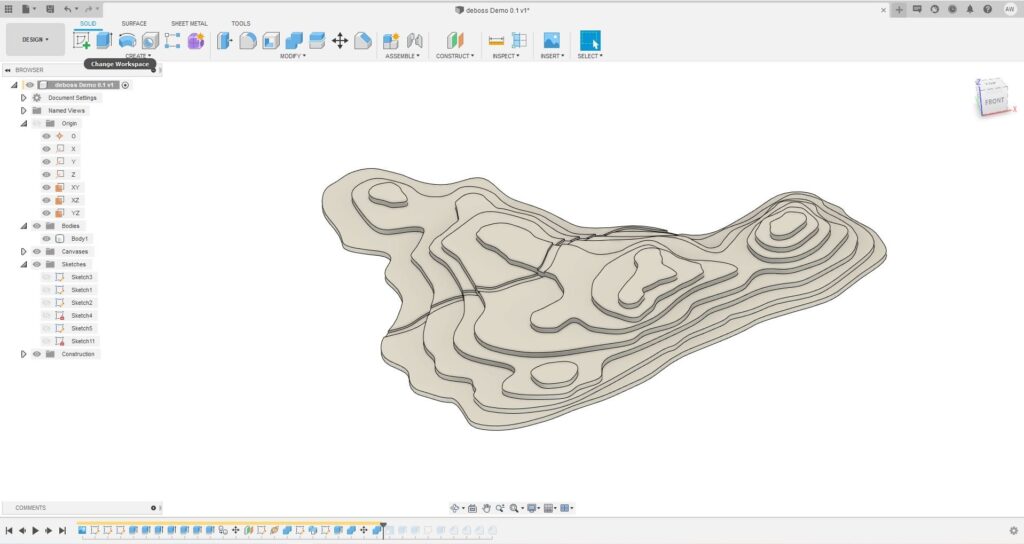
To finish off the process we use the ‘Combine’ tool again, but this time to cut the part body with the deboss body. If everything has gone right, we should now have a neat deboss on our part as intended.
Closing Thoughts
This was a fun post to write up. I expect that going forward I’ll be adding more short tutorials as I find and use helpful workflows in my projects.
Thanks for the read!
As always if you have any comments of feedback I’d love to hear from you.